Quantcast
Channel: Hunting Fishing Tips & Tricks
Viewing all 196 articles
Browse latest View live

Harvest Bigger Bucks

$
0
0

Scout More to Kill Bigger Bucks


Scout Hunt Kill

Scout now to find out more about your hunting area and kill bigger bucks during the season

What do you think about when you hear the combo of ketchup and mustard? For me, I think of a great combination that will make a mouth-watering brat taste even better. Great combinations are tough to find, hence the divorce rate in the U.S., but there are two things that go together better than anything that I can think of. Scouting for hunting success. In order to put big bucks on the ground, you need to do your homework, and there is no better homework in scouting than putting some miles on your boots. 

In order for us to reach our maximum potential as a hunter we must spend some time in the woods scouting. To consistently kill big bucks, you need to put in the time doing your homework and scouting is the way to go. Whether it’s on a computer looking at topo maps and boundaries or walking in the woods, you need to enjoy what you’re doing, or you wont do it…. (hence the obesity rate in this country).  I find just as much enjoyment seeing buck sign and shed antlers as I do seeing a big buck, well, almost.

When you are in the woods you need to make the most of your efforts in order to be successful otherwise things just won’t come together. Of course one can get lucky and can kill a big deer but more often than not they will come home empty-handed and disappointed. That being said, how would you like to increase your odds for success? I know I sure as hell do! The more you scout the more successful you are going to be, it might not happen right away but over time you will pick up on things that will help you out in becoming a more successful hunter.

Does Scouting Help Kill Bigger Deer?

antler-on-iceOne lesson I have learned over the years from my dad, who is now gone, is that “sometimes you need to sacrifice to gain.” This means that sometimes you may not hunt your best stand if the wind isn’t perfect. Or you may not walk through the easy route to a stand if it’s too noisy or you’ll hit a bedding area. Having patience in the early season and not burning up spots due to not having the right conditions can pay huge dividends later in the year.

Scouting during the off-season can get you where you want to be later in the year, and that’s with your hands around a huge rack. Put the time in and I guarantee that you’ll have a season to remember.

Hunting, Fishing and Outdoor News

Read more big buck hunting tactics and Outdoor News on Morning Moss everyday. Be sure to send us your favorite hunting, fishing and outdoor stories.

The post Harvest Bigger Bucks appeared first on Morning Moss.


First Ice

$
0
0

First Ice

By: Kyle Sorensen

My favorite time of the year has begun, and I have looked forward to this time since March. The anticipation has just been killing me up to this point, burning what feels like a hole in my chest.  It has seemed as though the days on the calendar have really taken their time to turn, even though in reality, the time within each day has remained the same.  I look forward to this time as there are many factors in play, and to me, it’s not just the ice fishing, but the entire experience and the challenges first ice presents. 

First ice is challenging.  It takes a lot for an angler to be able to successfully, and safely, tackle the first ice fishing environment; a lot of it relies on preparation.  As the temperatures are dropping, I am checking that “reliable” forecast coming in on my phone, hoping and praying for bitter cold numbers, with minimal wind.  Here on the Winnebago System (as with a lot of other places), this optimal forecast has been pretty hard to find the last few years.  Once I see something looking all purdy, such as a single digit temperature with a light and variable wind forecasted for a couple days, I’m ecstatic.  With that being said, the last few years I have found myself to be devastated when the numbers change and we pop up into the upper 30’s, leading me to feel like sitting on a beach somewhere, and the wind speeds of 15mph, relating to hurricane force winds in my mind… Yeah, it’s not that bad, but I don’t know how else to explain the feeling. 

It all starts with a skim layer of ice.  When it has been seen, the many trips to the bays and the Upper Lakes’ launches begin, along with the preparation.  Prepare?  What’s there to prepare for?  A nice, balmy 40-degree day to mess it all up?  Probably, but I’m sure a few of you go into preparation mode same as I do.  The rods are checked and rechecked.  The tackle is given a couple more once-overs, and the auger is probably started a couple more times in the garage, (just to let the neighbors know you’re ready).  The watching and re-watching of YouTube videos climbs to new heights because you never know if you saw every detail.  The one thing we do the most during this time is hope, hope for it to get here… now. 

On December 12th of last year, I made my way out onto Lake Poygan for the first time with a couple buddies.  Looking at the lake before stepping foot onto it gave me a very desolate feeling.  The only sound I heard was the small pieces of snow, gracefully dancing across the ice.  Even though I have spent many hours on Lake Poygan over the years, this adventure, like all, needed to have all of the safety aspects addressed.  I had my Frabill i-Float suit zipped and clipped, the phone was in a waterproof case, and a throw bag of rope was strapped to my hip… one CANNOT be too careful on the ice at any time of the season.  With safety concerns addressed, Ryan and I had the spuds at the ready, while Jason carried the Nils auger as we stepped onto the hardwater of Lake Poygan for the first time that season. 

Poking and prodding, zigging and zagging, we moved in and around the easily visible (and hidden) ice variations; it definitely took some time. About an hour and a half in, we had done it.  We had made it to some fishable water!  What a workout, but it was needed as we had passed areas with open water to about 6” of ice.  Standing out there, taking in a 360-degree view of what was around us… it was an amazing feeling.  I couldn’t help but thinking that we might have been the first individuals to walk onto the hardwater on Lake Poygan that season, able to access fishing ground. 

So how was the fishing, you ask?  Well, guess what, we didn’t even wet a line!  We did all that work for nothing, right? No.  This is what I’m getting at.  First ice is an experience that I love.  It challenges us in many ways, mentally and physically, to be able to feel the adrenaline rush of adventure.  A few days later, that “reliable” forecast I previously mentioned came around and messed up the ice conditions on our system.  With that, I was back on the hunt. 

Last year I wrote an article about traveling to find ice (from 2015) which lead us to Lake Nokomis.  It was a fun trip, and certainly one full of learning.  Well, we did the same last year, up into the same area but landed at Lake Alice this time.  The warmer days leading up to the trip only gave us 6”-7” of good ice without any snow cover to speak of so the snowmobile was grounded and the walking adventures began.  It was a fun trip and we caught some small walleyes but the feeling of getting onto the hardwater to get the lines wet for the first time was great. 

On the last day, we were blessed with a few inches of snow.  This lead me to walking across lake, spudding my steps, and checking the ice thickness to make my own trail for my sled to get across the lake to the marked snowmobile trail on the other side.  When that was accomplished, my wife and I jumped on the sled and got to experience some trail riding.  It was her first time and she loved it… I thought maybe I could convince her that I “needed” to upgrade my old sled for this year.  Tell me if I’m wrong, but if we don’t jump on the chance to take advantage of a situation such as this, we might miss the chance, right?  At least that sounded like an optimal time to bring up the conversation… but it failed… for now. 

If presented with less than optimal conditions again this year, who knows where I’ll end up chasing ice this year during the first ice period.  It’s always great to have backup plans in place in case our home bodies of water don’t freeze as quickly as we want.  The hunt for first ice can take us to many locations and present us with some amazing experiences.  Just like with everything else, you must work to be successful while chasing the feeling first ice can give you. 

If you want a fun adventure this year, I want you to do something.  Pick out a body of water to fish this season that is within two hours from your house, preferably north as you have a better chance at getting better ice conditions earlier in the year.  Plan for a shorter trip, a few days, so in case something goes wrong in what I’m suggesting, you won’t be wasting a full week or more.  If it does pan out, you’ll be mad that I only suggested a few days.  Either way, it will be an adventure, this I promise. 

With that said, make sure the body of the water that you pick out is something that is fishable and has somewhat of a reputation, as long as it’s a decent one.  Then look into lodging.  The place you stay certainly doesn’t need to be the Taj Mahal, just something to keep you warm and in an ideal location to the body of water you plan to target.  Check out VRBO and local tourism websites for the best/cheapest deal.  Once your lodging is set, pick up a topographic map of the body of water you are fishing and study it to its fullest.  Do all of the online research you can do and make some calls to local establishments. Try not to solely rely on what bait shops tell you. You might think this sounds absurd to not include the top resource, but trust me, it challenges you more to learn, possibly new things at that, and that makes the experience so much more fulfilling when doing it on your own, at least in my book.  Speaking from experience, if you go onto a brand new body of water and you are even the slightest bit successful, it will be an awesome feeling.  I have seen joy-filled faces, including on the Winnebago System, when a rookie (which could be any one of us) gets to fish an active school of fish. 

I have every bit of feeling that this year is going to be an amazing year on the hardwater.  I know so many of you are as excited as me and for good reason, especially on the Winnebago System.  This fall/late summer bite that we are slowly transitioning out of has been one of the best, if not the best, late season bites I have ever experienced on our system.  I truly hope this bite continues into the hardwater and we are able to land on one of the massive “zombie” schools of walleye we saw all last year.  Hopefully this year, those zombies will come to life and it will be some fast-paced action for the record books.  As the first ice hits, keep an eye on the OB Outdoors Facebook page for updates, and as always, until next time, “Tight Lines. Stay Dry.” – Kyle 

The post First Ice appeared first on Morning Moss.

Proper Food Plots For Whitetail

$
0
0

Consistently Giving You Multiple Benefits

By Steve Jordan

What is a tillage radish?  It is a carrot like plant with a gold tubular radish growing out of the ground.  The green leaves are similar to turnips and are highly sought after by deer.  The radish (gold cylinder) is eaten mainly by deer in late October through the winter. 

The tillage radish has been gaining popularity with farmers for the last 4 to 5 years.  They use it as a cover crop, planting it at least 8 to 10 weeks before a hard freeze.  This enables the plant to come close to maturity.

There are several benefits to planting tillage radishes.  The radish root system is very powerful and can penetrate the hard pan.  The hard pan is caused by compacting the soil with equipment year after year.  You typically only loosen up the top 4 inches of the soil with your normal farming practices.  Below the 4 inches tends to compress so roots don’t penetrate and water doesn’t soak through very well.  A healthy nightcrawler population will tunnel through that hard pan to help aerate the soil.  The tunnels let water soak into the soil faster and decrease potential water erosion and drowning out of crops.

The tillage radish has one or more large taproots that punch through the hard pan to a depth of 32 inches or more on the meat part of the root and another 6 feet in depth with the root hairs.  This plant picked up the nickname Bio-Drill for this reason.

Being an annual plant, the tillage radish will die from maturity, or freeze out eventually, every year.  Many of the tubers are eaten up by deer, similar to turnips in the fall or winter.  After the plant dies the roots decompose rapidly.  Depending on snow cover, the frost will only go down to a foot or so.  Below that level, the roots will decompose before spring.  A normal wet spring with snow melt and rain will rot the rest of the old root system leaving holes in the hard pan.  Now water can soak up with a lot less runoff.  Your new crop the following year, no matter what it is, will root down to the perforated hard pan, fan out its roots, and some will travel down the holes for more moisture and nutrients. 

The tillage radish is a nutrient scavenger.  Because its root system goes so deep, it can reach more nutrients.  Most of the crops that we plant for food plots are shallow rooted like corn, soybeans, turnips, wheat, rye, and clovers, for example.  A percentage of our expensive fertilizers seep down and into the hard pan when it is soft from excessive rain and spring thawing.  The tillage radish pulls these nutrients back up to where our crops can reach it.  These nutrients include nitrogen, potassium and potash.  Also they bring up trace minerals like boron, chlorine, copper, iron, magnesium and more.  These nutrients and trace minerals are stored in the tuber.  This is why the crop is so good and sought after by the deer.  It is like having live mineral blocks.  Any plant matter left behind is full of nutrients left right on the surface for our new crop the next year.  You will notice a thin white layer of calcium on the decaying plants in the spring.

The tillage radish grows great with winter wheat and rye.  It also makes up approximately 10% of all my turnip mixes.  It grows well in many soil types, but struggles with wet, soggy soil with poor drainage.  The plant germinates in about 3 days.  It will grow very fast.  If you fertilize it with nitrogen, it will grow even faster and get huge leaves and a massive root system.

After the last spraying for the year on your Round-up ready crops, you can broadcast radish seeds onto the corn edges and bare spots.  If your soybeans have been beat up by grazing deer, you can broadcast a turnip mix with 10% radishes over the top.  The first rain will set the seeds into the top muck layer and away they grow!

The tillage radish seeds are getting easier to get because of the farmers using them as a cover crop.  My favorite source is Midwestern Bio-Ag out of Black Creek, Wisconsin.  My contact there for seeds and fertilizer is Sierra Kalbus at 715-250-1837.

I’m always seeking out different or “new to me” crops to see how the deer and other animals react.  This is my third year experimenting with the tillage radish.  It is a green and gold Super Bowl contender in my food plots.  Go Pack, go!

The post Proper Food Plots For Whitetail appeared first on Morning Moss.

Game Recovery Dogs

$
0
0

Game Recovery Dogs…not as difficult as you might think? 

Over the years, I’ve written a pretty good number of articles on “developing deer dogs.”  More specifically, a dog that helps in pursuit of big game and more often than not, that big game is the whitetail deer.  So, what is a “deer dog”?  This used to be a pretty common question, although in recent years the understanding is seemingly growing as much as the popularity.   My definition of a “deer dog” is one that will shed hunt in the spring and track or aid in game recovery in the fall.  Particularly this time of year, the game recovery dog is worth more than their weight in gold and the frequency that a game recovery dog is discussed is obviously magnified.  

I wanted to point out that when it comes to game recovery, the dogs themselves have the majority of what is needed from a “nuts and bolts” aspect already inside of them.  We, as trainers and handlers, are simply trying to bring that out. I also hope to make it very clear that training a game recovery dog is something that is not only effective and efficient, but also relatively simple or dare I even say “easy” to do?  

Far too often I hear concerns that training a dog for game recovery is “too complicated,” “too difficult” or can only be done by a “professional.”  My hope is to help convince you that you and your dog have what it takes to at least give it a try.  To start out, I thought it might help to eliminate a few excuses I hear all too often like, “My dogs not bred for that.”  I truly believe that inherent traits impact and influence a dog’s ability to be a competent game finder or game recovery dog.  However, the nice part about that is the fact that I really don’t believe the specific breed matters.   In fact, as it relates to the actual ability of a dog to find or locate game that may otherwise may be lost, I not only disregard the specific breed, but I believe that most dogs are capable, right down to a “rescue” dog from the shelter that you may or may not know exactly what their genetic lineage even consists of.  The reason I say this is simply because a dog’s actual ability to use their noses effectively is just so great, despite pedigrees or titles.   In researching a dog’s ability to smell, there are so many things that I’ve found interesting but a few things really stand out: 

  • All dogs possess up to 300 million olfactory receptors in their noses.  (Humans have about 6 million) 
  • The part of a dog’s brain that is designated to analyze smell is, relatively speaking, 40 times greater than ours. 
  • A dog’s sense of smell overpowers our own by orders of magnitude—it’s 10,000 to 100,000 times as acute, The ability of a dog to use their nose in relation to vision would look like this: what you and I can see at a 1/3 of a mile, your dog could see as well at more than 3,000 miles away.  

I’m by no means discounting a nice pedigree.  I believe 100% that quality breeding is worth every penny and I will always put a great value on what I believe pedigrees’ offer in regards to health, trainability, disposition, confirmation, etc.  But I really don’t think that the pedigree itself limits any and all dogs abilities to smell.    

So ask yourself: 

  • Do you have a dog?  
  • Does your dog seem to use its nose around the house or yard?   
  • Does your dog show you signs of intelligence and a willingness to please you?   
  • Do you have an interest in using your dog to help in game recovery?   

If you have answered “yes” to any of these questions, I would say you have what it takes to do it.  Now it’s putting it all together and executing the plan, keep reading!   

Step 1.  Keep it simple and bring out their natural predator-prey instincts- 

If you’re reading this and deer season is open, put out a message that you are looking for a fresh deer liver.  If you can’t get a hold of one, a beef liver will do.  Have a helper hold onto your dog.  Simply drag the liver quickly away from the dog and after you get a good head start have your partner let the dog go.  Almost instinctively, your dog will take off on the line for you.  When they finally get caught up to you and the liver, let them lick on it some and give them a ton of praise.  Repeat this a few more times (3-4) with each repetition allowing a little more distance.  Follow this session later on that week with one similar, except at one point with one of the repetitions, don’t let the dog watch.  Cover their eyes or keep them in the house or kennel until you’ve made the drag.  

Step 2. Add in additional scent elements- 

The liver has a very distinct, strong, appealing scent.  That will peak interest early on and help ensure success, but it will not allow introductions to other scent clues that may be found while on the track.  In this next step, I like to switch to using real deer hides and a scent that I make myself called “Blood Trail”.  Don’t be confused, our Blood Trail scent is not simply just blood.  Think about it, if there’s strong visible blood on a track, I don’t need the dog.  Instead, it’s when there is none or very little that I need the dog.  Repeat step one using the Real Hideand Blood Trail scent and continue to lay the trail without your dog watching you.  At this point, be sure to leave your dog something to find at the end.  My personal choice is a deer-hide wrapped canvas bumper.    

Step 3. Wounded deer don’t always run straight- 

So, we have to start to teach our dogs to work turns, angles, backtracks, etc.  Once our dogs is taking tracks confidently in straight lines, it is time to keep them honest and remind them to not outrun their noses.  By incorporating simple turns to start, then add more turns and different scenarios on the line, our dogs will have to force themselves to slow down in order to continue to successfully follow the line.  You will be amazed at how naturally your dogs do this if you just set them up correctly and give them the chance. 

Step 4.  Don’t pass on a real training opportunity- 

The next time you harvest a deer (as long as you know the animal will be recovered) be sure to bring your student along and allow them to have that experience and success.  Don’t be critical or concerned if your dog struggles. The most necessary skill of any trainer is PATIENCE.  Use this as a great training opportunity and help your dog find success with the real thing.  You will be amazed what this kind of experience will do for a dog and their handler’s confidence.              

I challenge you to follow these four steps and see what happens.  Will that alone make you and your dog a great tracking team?  No, probably not “great,” but I would argue that it will undoubtedly increase your chances of finding a deer that otherwise may not be recovered.  In order to become truly great it will take time and experience.  But, if you try those simple steps and have some success I wouldn’t stop there. Instead, I would continue to work on other challenges and scenarios that you’re likely to encounter in the field.   

For much more information on training and training products available for game recovery be sure to check out our website (www.dogbonehunter.com) and social media outlets @dogbonehunter.  Best of luck in the woods!  

–Jeremy Moore  

The post Game Recovery Dogs appeared first on Morning Moss.

Gear & Tackle to Kick Start the Ice Season 

$
0
0

Gear & Tackle to Kick Start the Ice Season 

Ice fishing is in full swing here in Wisconsin! I have been able to get out a handful of times, much earlier than the past few years due to cool weather conditions. Each outing has been with my boyfriend, Kurt, and our friends/family. We have had some excellent days with dozens of slab crappie, handful of jumbo perch, and many eater eyes. On the other hand, we have had a few days where the fish were extremely finicky and the success rate was extremely low. Either way, it is always enjoyable to get out on the ice!

On my social media pages, I am often asked what gear I use during the hard water season and what my favorite tackle is. This blog will share some of the gear I use and my current go-to lures.

_________________________________________________________________________________

One question I am frequently asked is, “What rods do you use for ice fishing?” This is a simple answer for me considering where I grew up. My rod brand of choice is St. Croix Rods. Growing up in the Park Falls area, my family has always used their rods, year-round. This is my first ice fishing season with my own St. Croix ice rods. In previous years, I have used my dad’s or Kurt’s ice rods. The two rods that I purchased this season include the UL Legend Black Ice rod and the Custom Croix Ice (CCI) – Perch/Eye Spoon Rod. Why these two rods? Simple. The UL (ultra-light) Legend Black with the spring indicator system allows anglers to see a bite or strike even before fish feel tension. This has allowed me to successfully set the hook almost every time a fish swipes at a jig. The fight is exciting and smooth. Tackle that works excellent with the UL power, and have been dynamite for slab crappie, are diamond-tip tungsten jigs (see tackle section at the bottom of the page) and tungsten fly jigs. The CCI – Perch/Eye Spoon rod works excellent for most of the tackle I currently own. The decision to purchase this rod was based off my tackle selection and advice that was given to me from an employee at the St. Croix Rods factory store. The employee suggested this rod due to the versatility of tackle that can be used and based off the areas that I tend to target walleye. Shop these ice rods and more at https://stcroixrods.com/collections/ice

Side note: If you’re considering purchasing a CCI rod I suggest reading Joel Nelson’s blog on which rod will work best for you. Here is the link for your convenience

http://www.joelnelsonoutdoors.com/ask-me-anything/2018/9/17/which-cci-rod

__________________________________________________________________________________

The photo below is the flasher I use and was fortune enough to win during an ice fishing tournament a few years ago. This Vexilar is the FL-12 Series and works like a charm. The first flasher I ever used was an old Vexilar mode, which my dad taught me to use. Vexilar has stepped up their game since then – with three color display, high-quality graphics, tackle storage, built in interference rejection, and more! I am still learning some of the bells and whistles but am pleased with this unit. Check out the Vexilar lineup (new and refurbished) at http://vexilar.com/

__________________________________________________________________________________

Some might agree that the most common way to ice fish is with a tip-up. This is the first method I learned and is still one of my favorite ways to catch fish, especially walleye. I have used a variety of tip-up brands over the years and have always gone back to what I consider “my staple.” Pictured below is the Classic Hardwood Frabill tip-up, which is one of my favorite tip-ups to use. This specific tip-up has a smooth spool with a small handle piece for easy spool/pick up. Additionally, the wood finish holds up over the years and can take a beating. I also have found the Frabill brand tip-ups do not leak lubricant like other brands that I have tried. You can purchase Frabill tip-ups at Mills Fleet Farm, check them out for yourself! https://www.fleetfarm.com/search?Ntt=frabill+tip+ups

__________________________________________________________________________________ 

Now, onto portable ice shacks. Pictured below is the shack that Kurt purchased a few weeks ago. We have fished out of other pop-up shacks, which all do what they need to do – block wind and contain warmth. However, the feature that I love about the Eskimo brand shacks is the “IQ insulated fabric. According to https://www.geteskimo.com/ their IQ insulated fabric holds in heat 35% better than other brands. No matter the percentage, we have discovered that Eskimo holds heat extremely well compared to other pop-up shacks. In fact, the last time we used it, we had to turn the heater off and left the window cracked. On sunny days, these shacks hold heat extremely well and are an excellent escape from brutal conditions on those windy days. 

A quick view of my go-to tackle this ice season –

Diamond-tip tungsten jigs with spikes (or) Berkley Power Bait Ice plastics

Chubby Darter – 3 cm

ACME Tackle – Hyper Rattle

Well, that is all for now. I’ll be posting additional tackle and fishing tactics as the season continues. Please drop a comment below and let me know what your favorite gear/tackle is during the hard water season. Until then, tight lines and en-JOY the outdoors!

For more article check out Badger Sportsman Magazine

The post Gear & Tackle to Kick Start the Ice Season  appeared first on Morning Moss.

Keep Your Ice Outings Safe And Successful

$
0
0

Keep Your Ice Outings Safe And Successful

Traveling around Central Wisconsin from county to county, probing through the ice on many of  our state’s most popular bodies of water like I do is nothing to jump right into without doing some homework before each and every outing. Whether you are an avid ice angler that spends more time on hard water than in a boat, or just getting into the sport of ice fishing, there are many things to consider in order to keep every adventure safe. I am not only sharing safety tips here, but many different strategies that keep me and my clients consistently successful on many different frozen lakes.

EARLY ICE

Early ice can be some of the best fishing that you get into all winter, but that is also when someone may be at risk of the unexpected “polar plunge.” The three main hazards, when it comes to travel on any frozen lake, are current, cracks, and birds.  I like to start my early ice scouting before the ice is even close to safe by watching with binoculars from land. I will watch for uneven freezing in certain areas; which could be from geese keeping an area open or even wind and current that doesn’t allow the area to settle down and freeze the same day.  These areas are most important to know about for the first few weeks of the ice season until the ice thickness evens out over time. If you are unaware of an area that has just recently frozen over, you are at risk of breaking through.

Once the ice is finally safe, I run through my lake to lake patterns. What I mean by that is some of the lakes that I make my winter living on are always safe to navigate well before others are even frozen.  Shallower lakes like Puckaway, Poygan, and Butte des Morts, are usually fishable and productive far before some of the other big lakes.  Shortly after that I start roaming the river channel of the Wisconsin River, such as Castle Rock and Petenwell. That is about the same time that Winnebago is ready for ATV travel.  I normally have close to two months of great ice fishing in on these lakes and many more before we can start ice fishing on Big Green Lake. Like the rest, Big Green will have areas that are safe and areas of dangerous thin ice. The east half of the lake is always safe first due to more 100 foot depths, unlike the west end having more 200 foot depths. I have always said the most important information to have on any frozen lake is where the thin ice or pressure cracks might be. A guy told me one time that being on the ice every single day was high risk of getting wet, but I disagree. I feel much safer by practically living on the ice and watching new pressure cracks form and observing areas that could be a hazard on a regular basis.

Safety Strategy

Now that I’ve preached a little safety strategy, I can talk about some search techniques. It is hard to beat the run and gun method on most lakes, but I have seen this crazy short window of  fish movement over and over again.  During this short time of each day, you need to have a rod in your hand and not an auger.  What I mean is, I will have scouts and or clients in many different areas of a lake on the same day.  The fish will light up for everybody all at once, then 10 minutes later you would think that they disappeared, but they haven’t. They just don’t move until they want to eat.  This short window occurs at the same time with different fish all over the lake every couple of hours.  Many days of the winter I see these sporadic feeds that will accumulate a nice mess of fish for those who wait them out by staying glued to their locator.  On these days, or locations, the person that moved 25 times will usually have an empty pale at the end of the day. Most likely because during the short feeding window they may have been drilling or driving. By no means do I simply pick a spot and sit there all day on just any body of water. This only works for me on structure such as river channels, reefs, brush piles, stumps, and weeds; places that fish actually live during the winter months.

On the other hand, for some of the lakes that I frequently guide on, it is popular to search the sand, gravel, and mud flats for hungry schools of fish.  While targeting flats like that, I don’t sit still until I land on the fish. The open water flats of Puckaway, Winnebago, and Poygan have schools of roaming fish that sometimes take a lot of work to find.  In these cases, the way I search for schools is almost nonstop drilling of holes. Fishing half of them, and just dropping the locater in the other half to cover more area in less time. I will quite often drop the transducer in and out of a line of a dozen holes before I mark a fish or school of fish.  When I mark a fish, I quickly rifle a Swedish Pimple or Buck-Shot Rattle Spoon tipped with a minnow head or Chena bait down the hole. I try to read the fish by their first reaction, if it ignores my bait and travels by it, it could likely be baitfish or a rough fish. If it comes toward my search bait (jigging spoon), but does not bite it, I will then go to a tungsten jig tipped with either a spike, wax worm, or Chena bait. Another one of my go to finesse baits is a Northland bloodworm. I know it is going to be good when they come up fast and hammer the jigging spoon after a few aggressive twitches.  This approach will often lead us into hungry schools of perch, white bass, crappies, and walleyes all mixed together.  Sometimes it does take 100 or more holes of searching before we start filling buckets with fish.

Follow the preseason scouting tips to assure safety before traveling on any frozen bodies of water. Remember, knowing the type of lake or structure that you are targeting will tell you whether to wait for the fish to wake up and start to feed or if you need to travel and fish aggressively to find them. Also start with a louder shinier lure to locate fish then switch to more subtle lures if the fish don’t get fired up for it.   You will also find more helpful ice condition reports and fishing tips at www.Lake-Link.com

The post Keep Your Ice Outings Safe And Successful appeared first on Morning Moss.

Fishing Tributaries

$
0
0

Tributaries

By: Pat Kalmerton

When people think about traveling to the Midwest, or Sheboygan in particular, during the spring, summer or fall, they more often than not are in quest of an adventure that involves 1 of 2 highly sought-after Sheboygan County adventures; golf or fishing. Now, we have world renowned golfing in the area, but this article is about the fishing… not any fishing, but the kind that involves a fish that can only be found in a very small demographic of the world. The fish I am talking about happens to be fresh water trout and salmon out of Lake Michigan and its tributaries. 

When those who seek salmon or trout on Lake Michigan out of Sheboygan, WI, they usually think of charter fishing. Now, we, (Wolf Pack Adventures) do have a fleet of boats fully equipped to take your group on an adventure to do so, but I would like to get into other options in this article. 

Kayak, spin cast, and fly fishing. Say what?! Yes…these highly sought after trophy fish are certainly an option that everyone should consider! Have you ever been standing in knee-high water in waders with what looks and feels like torpedoes cruising up the skinny water directly at your location hoping they dart in another direction so they do not connect with a direct hit on what seems to be your only stability in the slightly running current? Or… been pulled around in a kayak down river by a 30-pound fish that has enough power to make you look like a fool? Now comes the best part…the chance to land those fish successfully once they bite your presentation for the picture of a lifetime.  

I’m sure you are sitting there reading this saying to yourself that I sound like I fell off my rocker. Well, kinda!! The adrenalin rush that comes over you when a high 20 to low 30 lb. fish crushes a Maglip on your retrieve while you’re basically sitting on water, if fishing out of a kayak, only to get tail splashed not once but certainly guaranteed at least twice, right when you thought the battle was over and you conquered the beast is unforgettable.  

If that is not your style, and you would rather test your precision and patience, you can stand in the water in a pair of waders with the current rushing around your legs and the fog lifting up around you because the water is warmer than the air. You can concentrate on where you are ever so gently laying that fly down on the water to entice that 20 lb. German brown trout you sighted sitting in the slack behind that one boulder that’s breaking the current. As you try to place that perfect landing, so your fly swings and changes direction at the perfect time to entice the trophy trout, a pair of mallards appear out of the mist only to almost take your head off making you react real quick while losing your footing, only to regain your composure and start that perfect series yet again. 

If you think these sound amazing, but you are the type of person who wants to relax, not work so hard, still do some fishing but have the time to sip on a beverage and smoke a good cigar while you do some business with a future client… Well, you can still experience all of these things by simply soaking spawn or shrimp with a lil’ corky or cast spinners making a flash that the fish just cannot resist.  

Spring, as soon as the ice is out and the rivers are open, is a great time to kick off the cabin fever. The tributaries to Lake Michigan are choked full of steelhead and browns.  You can keep track of what is going on by visiting Lake-link for current fishing reports and pictures. The main methods of fishing these fish are off the banks if the current is flowing too fast with casting spinner blades, casting Maglips, or find an outlying point, get on the end of it and set some rods tipped with Spin-N-Glo’s, shrimp or spawn.  

During the summer, if you are looking for a quick trip to catch fish, you will have a hard time finding trout and salmon since they dish out back into Lake Michigan. But, these same rivers are full of really nice bass and pike offering up really good fishing! Again use Rooster Tails, Maglips, or anything your little heart desires. 

Now we get to the fall. When you start seeing all the charter boats congregated in front of the harbors and people fishing off the breakwalls, start paying attention to the fishing reports on Lake-link again. Those salmon are starting to stage only to make their migration up into the rivers to spawn and die. This is the end of their life cycle. They run up into the rivers to lay their eggs. When you start seeing these fish that look like zombies jumping 4 feet out of the water, this is when they are breaking their eggs loose to lay. Generally, you have two to three more weeks of good fishing…that is for salmon. Once salmon start laying eggs, the big brown trout and steelhead come up into the rivers to feed on the eggs. The best methods for catching these fish are Maglips and/or crankbaits for the first two weeks. Then, it switches to a fly bite and streamer flies for two or three weeks. Once the fish start releasing their eggs, now is the time to switch over to spawn sacs behind a Spin-N-Glo. If you have a fish that just will not eat anything, let a Maglips wiggle in front of its face again…he will eat. 

As time passes the salmon are done and gone. Its getting cold. Deer season is going to be starting…grab your spin cast rods and bank cast for beautiful coho salmon with that deep red stripe and big hook jaw! 

The post Fishing Tributaries appeared first on Morning Moss.

Sturgeon Spearing: Wisconsin’s Hidden Gem

$
0
0

Sturgeon Spearing: Wisconsin’s Hidden Gem

Most Wisconsinites have heard of and know something about sturgeon spearing on Lake Winnebago and the upriver lakes.   Whether you have seen it, done it, or read stories about it-there is surely some common knowledge amongst sportsmen of this somewhat mythological season.  However, there are a number of you out there that are, as of yet, unfamiliar with sturgeon spearing, not to mention its draw, uniqueness, and history.   Sturgeon spearing is a great tradition in Wisconsin (and especially in the Lake Winnebago region).   While the sport and season are known entities to most Wisconsinites, the history of it and work that goes on behind the scenes is both impressive and necessary to keep this “jewel of Wisconsin” at the luster it now maintains.

Sturgeon spearing has gone through many evolutions over the past 40+ years.  Changes to season length and spearing hours, license sales, use of hook and line, decoys, and instituting harvest caps are some of these evolutions. Things, as always, change.  But, while technology, rules adaptations, better winter gear and a better understanding of these pre-historic fish have made the “spearing” aspect more accomplishable, the uniqueness and singularity of it is truly what sets it apart.   As the years go by, sturgeon spearing and its foundation stand still making it the, “most pure and level playing field outdoor pursuit in fishing or hunting,” according to Paul Muche, Treasurer of the SW chapter of Sturgeon for Tomorrow.

Sturgeon spearing, much like deer hunting, is a tradition for those that have been a part of and watched the sport continue over the past 40 or so years.  The difference is that, unlike deer hunting, the opportunities have gotten better over time to the point that RIGHT NOW is THE time to get on the ice in search of a record sturgeon.   Even if you don’t have a license to get one yourself (license registrations are due in October), just being on the ice and a part of the tradition is worth the effort.  It hasn’t always been this way- as the sport has gone through many changes over the years, arguably, each of these changes have been for the betterment of all involved-including the sturgeon.

The Badger Sportsman team recently had an opportunity to meet with members of the board from the Southwest Chapter of Sturgeon for Tomorrow.  The biggest message that was abundantly clear and was said with real energy was that the excitement and anticipation in and around opening day sturgeon spearing was indeed the greatest part of the season.  That came in contrast to what we thought they would tell us was the most exhilarating, and that is actually spearing a sturgeon. To follow the energy that was evident in describing the days leading up to the opener, we were told there is a definite, “buzz around the lake,” as people get ready, cut holes in the ice, set-up shacks, and get together to discuss “strategy” and a game plan.  Second to the excitement of opening day and preparations are the memories that are made each and every year. 

The actual spearing of a sturgeon is a rush few have had the opportunity to feel but the stories, bonding of family and friends, and traditions held up each year are the real draw for sturgeon spearing.  As Jim Patt, President of the SW chapter told us, “We get together with family on the ice, cookout, and have a great time.  We will have three generations out on the ice.”  And further, “My wife and her friends are now getting involved.  The ratio of men to women is getting be 60:40 which is a great trend for us.”  Even with our own experience on the ice, it was made adamantly clear that sturgeon spearing is much more than grabbing a spear, staring into a 6 ft. by 6 ft. hole in the ice and waiting for that “missile” of a fish to come by.  (However, that is a REALLY good and exhilarating part of it.)

As mentioned, the real story of the sturgeon spearing season is the anticipation, camaraderie and tradition that can be found right here in our, Wisconsin’s “back yard.”  Right here in Wisconsin, on Lake Winnebago and the upriver lakes, we have the truly unique opportunity to experience something that very few in the world will ever get the chance to experience.  If you have never come to the lake during sturgeon spearing-this is the year to do it.   There are countless registration stations, bars, and restaurants that are greatly involved in the season.  One of which, and a very well-known destination, is Wendt’s on the Lake on the southwestern shore between Oshkosh and Fond du lac.  Here, at Wendt’s, you can see the usually still breathing (yes, still breathing even after being speared, drug out of the water, hauled on a tailgate and PLUNKED on the registration table) pre historic and HUGE torpedo-like sturgeon.  That sight- in itself- is worth the drive and visit to see.

While the sights and images of the season alone are incredible, there is much work that goes into keeping this unbelievably unique season and tradition alive from year to year.   The season is in no small part thanks to the efforts of guys and gals like those connected to Sturgeon for Tomorrow as well as many other clubs (including Walleyes for Tomorrow and others) that work together in donating time, energy, and funds to protect and grow the sturgeon population on Lake Winnebago and the upriver lakes.  For example, those that are board members, members, or interested parties associated with Sturgeon for Tomorrow and other clubs have given back in excess of one million dollars in donations to see the sturgeon survive, prosper, and get to the level we have now.  That is and will hopefully be a level sustained for years to come.

One of the most impactful of the projects and donations the Sturgeon for Tomorrow clubs have undertaken is  establishing a “Sturgeon Guard” on the tributaries along the Wolf River.  The Sturgeon Guard ensures that sturgeon are not illegally harvested or disturbed when they are at their most vulnerable- which is during the spring spawning runs.  The Sturgeon Guard works 24 hours a day (with all expenses, lodging, meals, etc. paid for by Sturgeon for Tomorrow) to make sure that the sturgeon are not taken or harmed in any way.  Years ago, poachers would, “load up pick-up trucks in the spring with sturgeon.”  As a matter of fact they could just, “reach in the water and pull ‘em out.  They would stack ‘em up like cord wood and then sell both the flesh and caviar,” according to Tim Michels from Sturgeon for Tomorrow.  The institution of the around the clock sturgeon guard has done wonders for the sturgeon population and further has changed the mindset of local residents to turn in those that illegally take sturgeon from the shallow waters.

Another great result of the increase in regulations and protection of these fish is that according to Jim Patt, “years ago you would see one or two 100 lb. sturgeon speared.  In recent years there have been over forty 100 pounders taken each year.”  The increase in regulations, donations, time and effort to preserve this great tradition and spearing season have done wonders in the right way.  The season has not only been preserved over the years, it is flourishing thanks to the conservation minded individuals that had the foresight to establish Sturgeon for Tomorrow in the 1970’s and those that remain passionate and involved today.

As we continued to discuss the sturgeon spearing season we also learned a lot of little known facts regarding the evolution of the sport, its true uniqueness, the passion and tradition it has for those that come back to it year in and year out. 

Some of the evolutions and events may be common knowledge, while others are quite interesting and also somewhat comical.   One remembrance was that there was a period of time when it was legal to catch and spear a sturgeon by use of a hook and line.  It wasn’t too much of an issue until 1992, when it became a real advantage when water clarity was down to about 18 inches.  And it was really only utilized by a few sturgeon spearers (those in the ‘know’).  But once the secret was out that it was legal… and worked well… it quickly got out of hand and the result was that hook and line was made illegal.   As was elaborated on, the sport aspect was taken out when, “Guys would use broom handles and Penn reels and play cards while watching bobbers, then hook into one, bring it to the surface and then spear it.”  According to board member Tim Michels.  This was deemed to be illegal after much discussion between the sturgeon advisory board and the DNR.  And while this tactic is still illegal, there is some desire for it to be allowed once again for various reasons. Stay tuned. 

There was also a time period where the season ran for 24hrs.  Which initially really wasn’t a big deal as there were only a handful of guys that would use lights and stay out at night.  But, once word got out and hundreds of guys started to sturgeon spear at night, it was too much.  The DNR wasn’t able to regulate it and it too was made illegal.  With that, the spearing hours soon came to a close at 1 pm.  While this was a change, in many ways it was a change for the better and most, if not all, sturgeon spearers would probably agree. 

The early end time allowed the rest of the day (including daylight hours) to patronize local bars and restaurants, shops, stores, and have to time to move shacks to “a new hotspot” at a much safer hour than at night.  Again, a win-win.  It was a great move for the economy and fishermen alike.  The early end time also made a great impact on the season being about tradition, friends, and family as there is considerable time to spend talking about the day, making plans for tomorrow, and reminiscing about past seasons as well.  These are the aspects which are the true infectiousness of sturgeon spearing.

So, while many people have heard of and know at least something about sturgeon spearing, it is only thanks to the work of dedicated individuals that the season has continued and grown over the last 40+ years.  If you have time to come to Lake Winnebago and a sturgeon registration station like the one at Wendt’s, take the time to do it.  You won’t regret it.  And next year, be sure to get your license in October to give yourself a chance to really experience the season and all it has to offer. 

We wish all sturgeon spearers, their families, and dedicated sportsmen that have donated time, money and effort to keep the sport the “hidden gem of Wisconsin” it is, the best of luck and continued safety this season.

The post Sturgeon Spearing: Wisconsin’s Hidden Gem appeared first on Morning Moss.


Ice Fish Perch

$
0
0

Poinsett Perch

By: Ted Takasaki and Scott Richardson 

After several weeks of sub-zero temperatures, the ice fishing season across the upper Midwest is finally in full swing. We were able to at last get out on the ice a few weeks ago and what a day it was! Warm temperatures in the mid 30s greeted us as we drove out onto Lake Poinsett in South Dakota, one of the state’s best multispecies fisheries.

The ice conditions on Lake Poinsett were more than 12 inches. Permanent fish houses and pickup trucks were scattered all over the lake. Large groups of anglers were congregated throughout the basin of Poinsett and it took some time to figure out where to start. We were traveling with my good buddy, Scott Bauer, and we drove our truck outside of and around the packs of ice anglers until we felt the location was suitable for drilling some holes.

Lake Poinsett is one of the largest lakes in South Dakota at almost 8,000 acres, with a maximum depth of about 22 feet. This lake is located in Hamlin County and has several accesses that make it easy to get out to where the fish are. There is a variety of fish that inhabit this lake, including yellow perch, walleye, northern pike, smallmouth bass and crappies. It is one of the best lakes for fishing in South Dakota.

After drilling a few holes at 16 feet along the edge of the mud basin and checking them with our new Humminbird Helix 5 Ice Machine, we found several marks, which indicated there were some fish under us.

Scott immediately caught four jumbo perch and a couple small walleyes, before the rest of us could even get our rods out of our carrying cases! There was no doubt that we were excited about a great day of fishing!

The action was tremendous for the next few hours. Another good friend of ours, “300 pounds of Smitty,” joined us, and we proceeded to pound on the fish. We released numbers of smaller fish and kept some of the extraordinarily large perch that Poinsett is famous for.

After talking to some of the local anglers around us, it appeared that the bright, warm, and sunny conditions had really turned the bite on. We didn’t even get there until mid-morning. The extreme early morning bite was tough and the action slowed down for us as the sun drew closer to the horizon.

Ted found that banging the bottom with a spoon, tipped with a minnow head or wax worms, was the best technique. It seemed like the fish would be attracted by smacking the muddy silt basin bottom. By lifting our lures a few inches at a time, we were able to trigger bites. It is always a good idea to change your jigging motion several times during the day. This allows you to determine what the fish want at that very moment.

Ted was using St. Croix’s new Avid Glass rods and it appeared that they were instrumental in detecting some very light bites. The limber fiberglass tip acts as a spring bobber, which allows you to see very subtle biting fish. The trick to catching the light biters is to see the bite, then let the limber rod slowly bend and then set the hook. These new Avid glass ice rods have just the right action to allow the fish to bite, but not feel the rod above, thus allowing us to get a hook into the fish. 

We were very comfortable fishing out in the open on the ice during this warm, sunny day. But having a portable fish house/heater available is always a good precaution in case you are going out in more cold, adverse weather conditions. We believe that when fishing on ice, being comfortable catching fish is much more enjoyable than being miserably cold and catching fish.

So try taking a trip out to Lake Poinsett, South Dakota and enjoy some of the great ice fishing the state has to offer. It is advantageous to check out all of the online reports and then make a decision on where you want to go. There’s always fish to be caught and fresh perch frying on the pan to be enjoyed.


The post Ice Fish Perch appeared first on Morning Moss.

Article 0

$
0
0
 

Gear & Tackle to Kick Start the Ice Season

By: Alicia Thompson

Ice fishing is in full swing here in Wisconsin! I have been able to get out a handful of times, much earlier than the past few years due to cool weather conditions. Each outing has been with my boyfriend, Kurt, and our friends/family. We have had some excellent days with dozens of slab crappie, handful of jumbo perch, and many eater eyes. On the other hand, we have had a few days where the fish were extremely finicky and the success rate was extremely low. Either way, it is always enjoyable to get out on the ice!

On my social media pages, I am often asked what gear I use during the hard water season and what my favorite tackle is. This blog will share some of the gear I use and my current go-to lures.

One question I am frequently asked is, “What rods do you use for ice fishing?” This is a simple answer for me considering where I grew up. My rod brand of choice is St. Croix Rods. Growing up in the Park Falls area, my family has always used their rods, year-round. This is my first ice fishing season with my own St. Croix ice rods. In previous years, I have used my dad’s or Kurt’s ice rods. The two rods that I purchased this season include the UL Legend Black Ice rod and the Custom Croix Ice (CCI) – Perch/Eye Spoon Rod. Why these two rods? Simple. The UL (ultra-light) Legend Black with the spring indicator system allows anglers to see a bite or strike even before fish feel tension. This has allowed me to successfully set the hook almost every time a fish swipes at a jig. The fight is exciting and smooth. Tackle that works excellent with the UL power, and have been dynamite for slab crappie, are diamond-tip tungsten jigs (see tackle section at the bottom of the page) and tungsten fly jigs. The CCI – Perch/Eye Spoon rod works excellent for most of the tackle I currently own. The decision to purchase this rod was based off my tackle selection and advice that was given to me from an employee at the St. Croix Rods factory store. The employee suggested this rod due to the versatility of tackle that can be used and based off the areas that I tend to target walleye. Shop these ice rods and more at https://stcroixrods.com/collections/ice

Side note: If you’re considering purchasing a CCI rod I suggest reading Joel Nelson’s blog on which rod will work best for you. Here is the link for your convenience

http://www.joelnelsonoutdoors.com/ask-me-anything/2018/9/17/which-cci-rod

__________________________________________________________________________________

The photo below is the flasher I use and was fortune enough to win during an ice fishing tournament a few years ago. This Vexilar is the FL-12 Series and works like a charm. The first flasher I ever used was an old Vexilar mode, which my dad taught me to use. Vexilar has stepped up their game since then – with three color display, high-quality graphics, tackle storage, built in interference rejection, and more! I am still learning some of the bells and whistles but am pleased with this unit. Check out the Vexilar lineup (new and refurbished) at http://vexilar.com/

__________________________________________________________________________________

Some might agree that the most common way to ice fish is with a tip-up. This is the first method I learned and is still one of my favorite ways to catch fish, especially walleye. I have used a variety of tip-up brands over the years and have always gone back to what I consider “my staple.” Pictured below is the Classic Hardwood Frabill tip-up, which is one of my favorite tip-ups to use. This specific tip-up has a smooth spool with a small handle piece for easy spool/pick up. Additionally, the wood finish holds up over the years and can take a beating. I also have found the Frabill brand tip-ups do not leak lubricant like other brands that I have tried. You can purchase Frabill tip-ups at Mills Fleet Farm, check them out for yourself! https://www.fleetfarm.com/search?Ntt=frabill+tip+ups

__________________________________________________________________________________ 

Now, onto portable ice shacks. Pictured below is the shack that Kurt purchased a few weeks ago. We have fished out of other pop-up shacks, which all do what they need to do – block wind and contain warmth. However, the feature that I love about the Eskimo brand shacks is the “IQ insulated fabric. According to https://www.geteskimo.com/ their IQ insulated fabric holds in heat 35% better than other brands. No matter the percentage, we have discovered that Eskimo holds heat extremely well compared to other pop-up shacks. In fact, the last time we used it, we had to turn the heater off and left the window cracked. On sunny days, these shacks hold heat extremely well and are an excellent escape from brutal conditions on those windy days. 

A quick view of my go-to tackle this ice season –

Diamond-tip tungsten jigs with spikes (or) Berkley Power Bait Ice plastics

Chubby Darter – 3 cm

ACME Tackle – Hyper Rattle

Well, that is all for now. I’ll be posting additional tackle and fishing tactics as the season continues. Please drop a comment below and let me know what your favorite gear/tackle is during the hard water season. Until then, tight lines and en-JOY the outdoors!

– Alicia


The post appeared first on Morning Moss.

Striker Brands – Ice Fishing Suits

$
0
0

Striker Brands – Ice Fishing Suits: Mother Nature has met her Match!


Striker Brands: Ice Fishing Apparel

Picture this…


“Today is the day! You’re getting out on the ice and you couldn’t be more excited! You have all your gear packed, food packed, coffee brewed, and are ready to get out and catch some fish. You want to get to the fishing spot you’ve been thinking about for the past month or so, so you leave far before the sun is up. Once you arrive at your destination you unload your necessities and make your way onto the frozen lake. You’re pulling a sled behind you, which is filled with everything you’ll need for the day. A huge smile spreads across your face as you continue to walk on the ice towards your fishing spot. The only thought going through your mind is how many fish you’ll catch and keep for a fish fry tonight, when suddenly one of your boots breaks through the ice. Without a second to react, your other boot breaks through causing your entire body to fall into the freezing depths of the lake.”

 
“Youth” Predator Ice Suit – heading to the lake
 

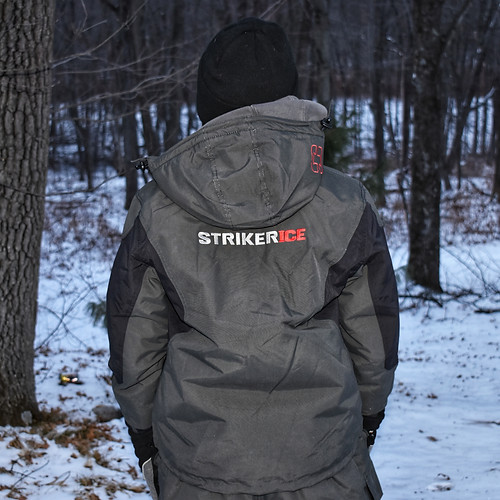
Has this happened to you or to someone that you know? If not, that’s a wonderful thing. Safety is an important component while out on the ice; it should be every anglers’ priority. The truth is, anyone can fall through the ice at any point of the season. If you’re sitting there thinking, “That’ll never happen to me!” Well, you better think again, because breaking through the ice can happen to anyone. I am writing to tell you why now is an excellent time to purchase an ice fishing suit that will save your life and can handle anything Mother Nature throws your way! This article will guide you through why Striker ice suits are preferred by many anglers season after season.


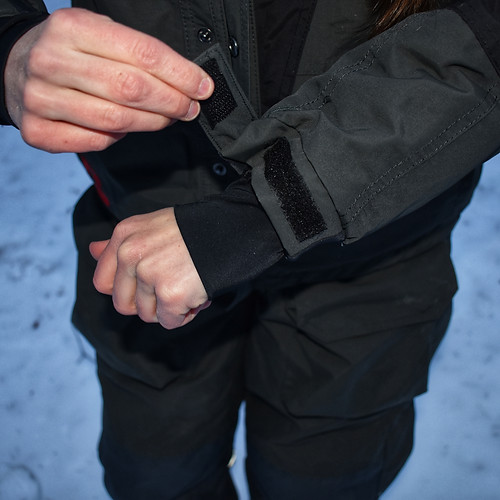
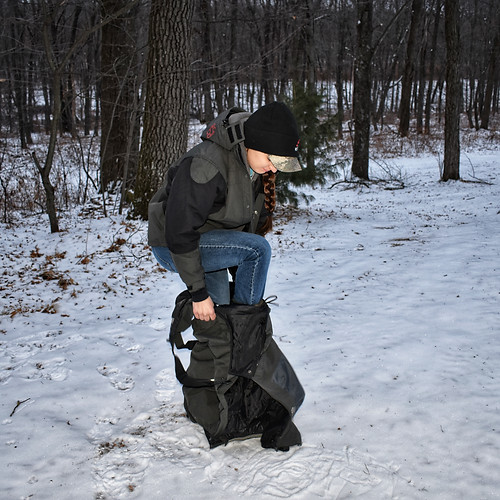
Striker Brands offer ice suits for men, women, and youth. The style featured below is the “Youth Predator” series. The bibs and jacket assure safety with “Sureflote” flotation technology and have several features that allow anglers to be successful out in the elements. The 100g Thermadex insulation and Hydrapore waterproof fabrication are the ultimate combination to keep an angler warm and comfortable. The warmth and waterproof features allow less layering underneath, which adds mobility and comfort while on the ice. The feature I highly value is the extra padding in the knees. As an angler who likes to be close to the action, as a fish nears the surface of a hole, I need bibs that offer comfort. The Predator bibs have saved me from bruised, wet knees and ice clumps stuck to my legs. Another aspect of these bibs includes the two large front pockets that zip and button shut, which keep items close and dry. Also, adjustable cuffs to shorten the length of the bibs as needed. The bibs can be put on and taken off without having to remove boots first. The zippers and buttons located on the outside of the legs easily glide up to the lower portion of the hips for easy on and off. Lastly, the jacket features waterproof, adjustable cuffs to help anglers maintain their warmth while out in the elements.


Outdoor Bound TV” Crew – Reviews


Striker Brands – Women’s Prism Ice Suit
 

Ali Juten, also known as “Ali Upnorth” – creator of Empower Outdoors Podcast and hunting Pro-Staff team member of Outdoor Bound Tv loves her Striker ice suit. While out on the ice she wears the Women’s Prism bibs and Jacket.


“I love that the whole suit has the Surefloat technology, which not only keeps me warm, but gives me a little peace of mind on the ice. But by far my favorite feature is the two zippers in the back of the bibs so I don’t have to take off my bibs to go to the bathroom! They were definitely thinking of lady anglers when they designed it.” – Ali Juten


Striker Brands – Men’s Hardwater Series Ice Suit
 

Kurt Walbeck, host of Outdoor Bound Tv, stays safe while out on the ice by wearing the Hardwater Striker Ice Suit. Kurt shared with me some of his favorite features from the Hardwater jacket and bibs…


1. Kurt is a relatively tall guy and his Striker ice suit fits perfectly to the length of his arms and legs. He also mentioned the ability to shorten the cuffs on the bibs for individuals that are not as tall.


2. Having a peace of mind is a wonderful thing while you’re out in the middle of a frozen lake. All Striker ice fishing suits are equipped with Surefloat technology, which Kurt spoke highly of. “You can never be too sure when you’re out on the ice.” The Surefloat technology has been proven to save lives – https://strikerbrands.com/pages/life-saving-stories


3. The adjustable cuffs on the jacket offer “extra warmth for anglers, especially when riding on a snowmobile or four-wheeler to get to a fishing spot.” The cuffs are waterproof and keep out unnecessary wind and snow.


Striker Brands have created high quality ice fishing suits for men, women, and youth. The suits keep anglers safe, warm, and comfortable throughout the hardwater season! Striker Brands gear including: bibs, jackets, hats, gloves, and other apparel can be found at most outdoor retail stores. They also have a large selection of these items on their retail website – https://strikerbrands.com/


Be sure to subscribed to “Alicia Joy Outdoors” for adventures, reviews, and more!


Until next time….tight lines and en-JOY the outdoors!


Alicia

The post Striker Brands – Ice Fishing Suits appeared first on Morning Moss.

Winter Panfish

$
0
0

Into the Deep for Winter Panfish

By: David Duwe

For many years, my father and I were plagued with catching only 5 to 6 inch panfish while ice fishing in the shallow weed flats.   My how things have changed, with Vexilar and Marcum fish locators, 5-6 inch panfish are a thing of the past. The ability to see underneath the ice opened up the deep water structure on many local lakes. With fish locators, ice fishermen can now work the deep water locations where the larger panfish reside.

When I say deep water locations, I’m referring depths from 18-30 ft.   The deep water panfish bite relies on clear water, enabling weeds to grow in depths of 20-27 ft. Some of the best deep water lakes in Southeast Wisconsin are Big Cedar Lake in Washington County, Pleasant Lake and Turtle Lake in Walworth County and Beaver Lake in Waukesha County.

The deep water fish are roaming; they aren’t concentrated in one spot for long because of the lack of structure. One needs to keep moving around, hole-hopping if you will, to find the aggressive fish. Most often the fish are tight to the bottom and you won’t see them on your locator until the jig gets near them. Another benefit of deep water fishing is the multiple species that you can catch. Not only do the bluegills use the main lake basin, but you can also find perch, white bass and an occasional largemouth bass. To get started, I begin on a weedline in 12 feet of water and gradually drill holes and go deeper finding the larger active fish. Most of the time, the fish are off any kind of weed in 20-25 feet of water.

My most sought after query…

In mid-winter is the yellow perch. Deep water perch fishing is my most constant pattern.   Deeper water to me means greater than 20 feet. The biggest challenge of ice fishing perch is locating them.   A good pair of boots and a Vexilar flasher is a necessity. Perch roam in small to massive schools. Finding an active school can provide all day action. It is always better to bring a friend along both for safety and eliminating unproductive water. Make sure your fishing buddy’s wife enjoys reading as it will help insure a long day out on the ice. Once I get to my desired area, I will drill a bunch of holes and start searching. Perch can be belly to the bottom or suspended up from the bottom. I will always fish the suspended fish first to prevent spooking the lower fish. Make sure to fish every hole a sufficient amount of time as the fish won’t show up on the Vexilar until a bait is presented. A good search bait is the Lindy Rattlin’ Flyer. The lure can be fished quickly to help find the roaming schools. These spoons put out plenty of flash and the good vibrations. Hop the spoon off the bottom a few times to see if you can get the actively feeding fish. As I am working the bait, I am constantly watching my Vexilar FL-20.

Spoons are good for actively feeding perch, however most of the time perch are neutral or in a negatively feeding pattern. With this in mind, it’s time to get subtle. A tear drop jig or Lindy’s new Toad jig are great choices. When fishing in deep or dirty water applications, the color choice is important, always use a glow color. This adds visibility to aid in the bite. Add a heavy weight 3 to 4 inches above the jig.   The heavy weights are called pencil weights or I like a weight attractor by Tommy Harris Blades called an agitator in a ½ oz weight. The weight allows you to fish faster, getting the jig to the fish. Fishing faster in deep water, prevents the fish from roaming away before you catch as many as possible. To help pick up the pencil weight on the Vexilar, I add a very small washer above the weight. Again, fish suspended fish first as you don’t want to spook the whole school. Tip your ice jigs with spikes or wax worms. If I am over a big school, I will put another pole down, a dead stick, about 1 foot above. A dead stick is a pole you just let fish without any action. I will bait my dead stick poles with live bait, a small minnow or wiggler.

I use a stiff small jig pole…

With a spinning reel spooled with 4 lb. test. Fishing in such deep water you will need to reel in the fish. Also, when the fish bite the stiffer rod, it will let you set the hook more effectively. Because of this, I use a spring bobber. Consider the sensitivity of the spring bobber; don’t use one for bluegills because they are too sensitive with the heavy weight. I always try to have multiple poles rigged so I can change baits quickly without having to re-tie. A change of bait can entice a lot of the non-biters and get a school active again.

At night, crappies move into more open water. They are notorious for suspending throughout the water column. Crappies will school up in large numbers and wander throughout the lake feeding. With the fish off structure in the main lake basin the depth varies and is very dependent on the body of water you are fishing.   The constant for most lakes is the crappies will suspend off bottom.

For schooling crappies…

I will try to fish three poles, which is the maximum allowed in the state. Two of the poles are dead sticks and the third will be in my jigging hand. The presentation I use is similar to summertime slip bobber fishing. I use a small Thill bobber with a small treble hook (size 16), and a small split shot. I like to position one of the dead sticks about a foot off bottom and the other will be 2-3 ft. off bottom. Minnows are undisputedly my favorite bait for late ice crappies. Of course, when using a locator you will be able to see exactly the depth they are coming in at. You can adjust your presentation to match their location within the water column. My jigging rod will have a small spinning reel spooled with 4 lb. Silver Thread. I found that lighter line isn’t essential when you are fishing at night.

On my jig pole I will use a spring bobber. Unlike most fish, crappies will strike both in an upward or downward motion. When a fish bites it usually jiggles your spring bobber downward. When a fish is biting upward, your spring bobber will go straight. This indicates an upward bite. You need to set the hook fast. When fishing a Thill bobber, if a fish bites upward your bobber will go flat on the surface of the water.

Fishing for panfish beneath the ice can be great fun, you just need to know where to look!

The post Winter Panfish appeared first on Morning Moss.

Targeting Basin Crappies

$
0
0


Basin Crappies

Winter is in full swing. Panfish, and crappies in particular, are some of the most targeted species throughout the winter months. 

In general, crappies are a relatively nomadic species and can be found across countless types of structure throughout a body of water. This includes weeds, wood, rocks, and basins to name a few. Perhaps the most consistent bite throughout the winter months occurs in the main basin of lake.  In fishing terms, a basin is the deepest, relatively featureless portion of lake. 

(Map courtesy of Garmin ActiveCaptain)

A typical fall will drive schools of crappies from their summer haunts to the basin of the lake, where fish can be found suspended throughout the water column.  Predictable depths for winter basin crappies range from approximately 20-40 feet of water. However, crappies can be found at depths much shallower or deeper. 

Most relatively small, natural lakes share a similar pattern so replicating results can become increasingly easier. These patterns and techniques related to winter crappies can also apply to flowages and impoundments, although they may not prove to be as consistent. 

(Map courtesy of Garmin ActiveCaptain)

Using a handheld GPS, I start my search in the deepest portion of any main lake basin. My first hole is typically in the center of the basin and work my way towards the edge of the hole. On an average day I will drill around 20-30 holes before I start looking for fish.

If you’re fishing a heavily pressured lake with a lot of fishing traffic, I would recommend starting the search on the least populated portion of the basin. I personally won’t venture within 100 yards, give or take, of the closest shack. 

Prior to actually wetting a line, rely on your electronics to determine if fish are present in the vicinity. Swing the transducer back and forth across the hole to see if fish are nearby. This can also help determine which hole you should proceed to next. Travel hole to hole until you start marking fish.  If you’re not marking fish, keep drilling. It’s not uncommon for anglers to drill more than 100 holes in search of active fish. 

Presentation is key to success on the ice. Tungsten jigs in the 3-5 mm category excel in situations involving deep water crappies. Micro plastics are absolutely king when it comes to basin crappies, in my opinion. Most major brands have countless options designed to imitate food sources crappies commonly eat. They also allow for fish after fish without replacing “bait.”

Recommendations for fishing with plastics: (1) Pair the plastics with appropriately sized jigs.  (2) Fish the plastic as designed. If it’s meant to be fished horizontally, then ensure the lure remains horizontal. If necessary rotate the knot on the hook so the entire setup remains perpendicular to your line.  (3) Have confidence. Confidence is key when fishing artificial lures. 

Rods & reels are often overlooked when it comes to ice; but having a quality set up is just as vital on the hard water as it is on the soft water. Opt for something stout enough to handle quality fish, yet sensitive enough to feel and see the lightest bites. There are countless options on the market that’ll meet the average anglers needs. I opt for rods around the 30” range because they allow me to fish comfortably and effectively both inside and outside of a fish house. Power Noodle style rods, as well as rods tipped with spring bobbers make a huge difference in detecting the lightest bites. 

Inline reels also offer some advantages when targeting finicky panfish through the ice. The reel is specifically designed to prevent line twist which in turn won’t result in a presentation spinning 25 feet below the surface. 

From a conservation perspective, it is vital to be cognizant of the depths you are fishing in. Pulling fish from depths of greater than 20-25 feet can result in barotrauma. Barotrauma incidents are likely to be fatal to the fish. Even though a fish swims away, that doesn’t mean it’ll necessarily survive. If you’re fishing in deeper water, plan to keep some fish for a meal. 

These patterns will typically remain pretty consistent throughout most of the winter months, until panfish make the move to skinnier water in the spring. Rely on the tools available, drill some holes, offer the right presentation for the situation, and you’ll be sure to put some fish topside this winter.

Good luck out there!

The post Targeting Basin Crappies appeared first on Morning Moss.

Spring Turkey Tips

$
0
0

What to Do When Your Turkey Hunting Plan Blows Up  

By: Brian Lovett  

Having a plan always results in better turkey hunting. And sometimes, gobblers follow that plan. Other days, however, they toss the playbook aside and leave you scratching your head.  

But the game shouldn’t end there. When a longbeard throws you a curve, switch tactics to keep your hunt alive. Let’s examine several common broken-plan scenarios and look at how you can adapt.  

Destination Denied 

Instead of chasing gobbles or slipping under roost trees, many hunters prefer to set up at likely spots or places they’ve observed birds — food plots, ag fields, acorn-strewn flats or shady loafing areas — and wait for turkeys to come to them. It’s a solid strategy — until your gobbler doesn’t show up. That prompts a question: Do I wait longer or pursue another bird?  

The answer depends on turkey activity and the quality of your scouting information. If you’ve seen nothing at your hotspot but a bird is gobbling his wattles off 150 yards away, the answer is obvious: Go to him. Conversely, if you’ve seen a longbeard and hens cross through a pasture gate several consecutive days, you’re probably better off to sit there patiently. Solutions are rarely that obvious, though.  

Typically, I try to resolve the dilemma by provoking a gobble. That doesn’t mean I hammer an area with incessant yelping or locator calling. Instead, I run through several calling series with various calls, gradually building the intensity or trying to portray different scenarios. If one call or series generates a reply, I gauge the situation. Did the turkey cut me off? If so, I might fire him up. Was he relatively close? He might be coming, or I can at least work him from that setup. Was he distant, or was his response tepid? Then it’s probably best to course his location and make a move.  

Whatever you do, make a decision. Hesitation and uncertainty never serve you well in the turkey woods. Resolve to stay put or strike out elsewhere, and then analyze the results.  

The Tease 

Every turkey hunter has battled a bird that flew down, gobbled lustily and then seemingly drew a line in the sand and wouldn’t commit. It’s frustrating, but you have many options to save the hunt.  

First, try to determine why the bird won’t approach. Hearing scratching or soft yelping near the gobbler provides an easy answer: hens. In that case, stop yelping at the tom and try to engage his ladies. If that doesn’t work, determine where they’re headed, and try to circle around them and cut them off.  

Solo gobblers that won’t commit offer a tougher challenge. Often, we blame obstructions such as fences, creeks or thick cover. However, turkeys cross such obstacles every day, and a fired-up longbeard will duck under a fence or fly a creek. Still, changing setups is never a bad idea. Turkeys move throughout the day, so yelping as you move to or from setups seems natural. Calling frequently from one spot might seem unnatural. Sometimes, easing 50 yards to another tree, calling as you go, might prompt a gobbler to break. Walking away while calling and then slipping back toward the turkey can also work, provided you’re careful not to bump him.  

I usually figure a gobbler stops advancing because of something I’m doing, so I’ll switch tactics. If I’ve been calling sparingly, I’ll ratchet up the intensity, trying to work the bird into a lather. If I’ve been calling a lot — usually the case — I’ll tone down my approach or stop calling. That might be the best approach to breaking a stubborn bird. By shutting up for a half-hour or longer, you can play on his social curiosity, prompting him to come closer for a look. Be careful, though, as he’ll often do so silently.  

If nothing works, I let the situation play out and see what the gobbler does. Observing his reaction puts me closer to tagging him later.  

Bye-Bye Bird 

Some turkeys have a sense of humor, gobbling at your calling as they travel directly away from your setup. That’s maddening but not impossible. As with a stationary gobbler, try to determine if the tom has hens. If so, call to them. If that fails, figure out their travel route, plan an intercepting course and try to cut off the group.  

If the gobbler seems to be alone, refer back to your scouting and guess where he might be going. Perhaps he’s headed toward a meadow or open ridge where he can strut or find hens. Beat him to the spot, and wait at least an hour for him. Maybe he’s just meandering. Back out, switch spots and try to strike him again. Remember, movement is natural, and perhaps you were calling from a spot where the turkey didn’t feel comfortable.  

When a turkey walks away gobbling but then shuts up, be patient. It makes no sense to pursue a bird when you don’t know or can’t guess his whereabouts. Let the turkey do his thing, and try to strike him later. Or ease out, find another likely calling setup and start the game again.  

If you fail, replay the hunt in your mind, and plot a new approach for the next day. Eventually, you might stumble onto his destination or travel route, or figure out what he likes to hear.   

The Boys Club 

Now and then, especially later in the season, two or more gobblers might ignore your calling but sound off frequently as they join forces. If you’re between those birds, great. Let them do their thing, and hope they come closer. If not, switch gears.  

Try gobbling or jake-yelping at them. A longbeard might not be interested in hens, but he won’t forget his place in the ever-dynamic turkey social structure. Gobbling or jake-yelping might prompt a gobbler to rush in, looking to kick the tail of a rival. Or, it could reassure a turkey that seems more interested in male company that his buddies are waiting for him. Remember, gobblers hear the vocalizations of male turkeys as often as those of hens, so this strategy seems natural. Of course, you must be prudent when gobbling or jake-yelping. Don’t try it on public land or heavily hunted private ground. Be certain no other hunters are close enough to mistake your calling for the real thing.  

If switching up doesn’t work, try to keep the turkeys gobbling with turkey or locator calls, and determine their travel route or destination. You can always relocate and try them again.   

Mother-Ship Evacuation 

You’ll often encounter large traditional roosts where turkeys spend the night but leave soon after flydown and don’t return until fly-up. Such spots are especially common in areas with lots of open fields. Setting up near these sites and trying to yelp birds in works sometimes, but turkeys are often in a hurry to find feeding or strutting areas away from the roost, leaving you behind. If you can’t find good ambush sites, you have two options.  

First, plan a pre-dawn roost invasion. Slip into the area well before dawn — sometimes two or three hours before flydown — and wait. Try to get directly underneath turkeys in hopes that they fly down in range. This can be extremely difficult, especially during a bright moon, in wet or brushy spots, or when dealing with large groups of birds. Scout the area at midday to determine the easiest, stealthiest approach and setup. Use a rake to remove leaves and debris from your planned approach. Set up a blind to hide your movements the next morning. Turkeys won’t always hit the ground in front of your barrel, but you’ll likely see or hear where they go, which might provide the missing piece of the puzzle.  

If a fly-down ambush isn’t viable, hunt the birds during the afternoon or evening. That doesn’t mean you should sit at the roost tree and kill a gobbler as he prepares to fly up, although that works. I prefer not to hunt them that way, as one gunshot or ill-timed move can blow up a roost for several days or even the season. Instead, sit at a likely approach route, and try to intercept birds as they meander back to roost. You can usually determine their travel path by glassing feeding turkeys during afternoons or listening for them right before flyup. Then, set up at a good spot, call sparingly and see what happens.   

Why’d He Do That?  

Turkeys don’t read hunting magazines or how-to advice. They’re turkeys, and unpredictability is in their nature. Sometimes, there’s no apparent reason for their playbook-busting behavior. Watch. Listen. Think. Consider the conditions and phase of the breeding season. Try something different. The only sure-fire way to not kill a gobbler that foils your best plans is to be stubborn and stick with an unsuccessful strategy.  

The post Spring Turkey Tips appeared first on Morning Moss.

Early Season Trout

$
0
0

Early Season Trout

By: Blake Tollefson


It’s been a long winter, and based on the long term forecast, it’s not showing any signs of ending soon. Many anglers are looking to scratch that open water itch, however, most of the state is still ice and snow covered. Fortunately, for Wisconsin fishermen, a large portion of the state’s trout streams are open during the early catch and release season. 

The Badger State’s early season runs from January 5, 2019 to May 3, 2019. Only artificial lures are allowed. 

A light fly fishing set up (4-5 WT) and a series of small assortment of flies will be sure to be put some trout in the net. 

Don’t have a fly rod? Not a problem! Using an ultralight spinning “panfish” set up will suite you just fine. A 5.5 FT to 7 FT ultralight to light rod and reel will suffice. Plastic paddletails and twister tails, along with small crankbaits and inline spinners, are very effective for targeting stream trout year round.

The cooler temps are preventing a lot of runoff thus far. Fish locations can be relatively sporadic throughout the smaller streams, but be sure to focus on areas with some structure. Remember to be mobile; if a spot doesn’t produce within a few casts, move on to the next one. 

With these cold temperatures, be prepared to release fish quickly. Try to keep fish in the water as much as possible. Have a hook remover and camera handy, so you’re able to snap a picture and return the fish to the water quickly. 

Most streams throughout the state are open for the early catch and release season, but be sure to check the Wisconsin DNR website for your area. For more information on the early catch and release season and trout fishing in Wisconsin, see the links below.

Inland Trout Regulations: https://dnr.wi.gov/topic/fishing/regulations/troutregs.html

The WI DNR provides county maps with all trout steams listed: http://dnr.wi.gov/topic/fishing/trout/streammaps.html

WI DNR Catchable Trout Stocking: https://dnr.wi.gov/topic/fishing/trout/CatchableTrout.html


 For more articles click here

The post Early Season Trout appeared first on Morning Moss.


Versatility of Soft Plastic Swimbaits

$
0
0

The Versatility of the Soft Plastic Swimbait 

Big Bass Baits, Jig Trailers and in between, the Soft Plastic Swim Bait Can do it All 

By: Glenn Walker

When you say the word swimbait around a bass fisherman, many times their thoughts go to big baits that cost a lot of money and only work for targeting big bass.  However, the soft plastic swimbait is also a great lure option to target big bass in a variety of fish holding cover.   

The soft plastic swimbait has also evolved into a versatile option to present bass with a natural presentation in numerous situations. 

One of the ways that soft plastic swimbaits, both solid and hollow bodied can be rigged is on a Texas-rig.  By rigging your baits this way you are able to fish the bait through heavy cover, thus presenting a very natural looking presentation in the dense cover that bass live in.   

Some of the areas that this presentation shines in include, shallow vegetation, such as eel grass flats and lily pad fields.  You can fish this bait along the edge and let it just tick the vegetation or cast it into the grass and bring it through the cover; this will look like a baitfish or bluegill fleeing a predator. 

The two other areas of shallow water cover that a Texas-rigged swimbait is a good choice are laydowns and boat docks.  The bass that inhabit these areas see countless jigs, spinnerbaits and even shallow running crankbaits.  So if you can present something different to them, you are likely to have some great days on the water. Around boat docks there is a plethora of baitfish and bluegill, so a swimbait mimicking that forage will tempt bass to come out from underneath the dock to hit your presentation. 

Some of the tackle that you’ll need for this presentation includes a hook, the two options you have include a standard extra wide gap hook with a small tungsten weight in front of it, or a specialty swimbait hook that has a corkscrew up at the hook eye and a weight on the shaft or bend of the hook. My two choices would be a Lazer TroKar Magworm (TK120) 4/0 or 5/0 hook, depending on the size of the swimbait, with a 1/16 or 1/8 oz. tungsten weight pegged in front of the hook.  I’ll use this setup when fishing in and around vegetation, as it will come through the cover with ease.  When fishing around boat docks or laydowns, I’ll opt to go with a swimbait hook like the TroKar Magnum Weight Swimbait (TK170) hook. 

Regardless of which rigging option I go with, I’ll use a long 7’6” Witch Doctor Tackle Voodoo II Medium Heavy Power Fast Action rod. I can make long casts, feel exactly what my bait is doing and then have the power to get that bass out of the heavy cover.  For line, I’ll either use 15 or 17 lb. test Seaguar Inviz X Fluorocarbon line, as it is very abrasion resistant and I can make long casts with it. 

Another reason that the swimbait is so versatile is that it makes a great trailer for several lures.  Using a swimbait as a trailer on a swim jig, vibrating jig or spinnerbait is something different than a standard grub, thus giving your bait a bigger profile and different than what other anglers are presenting to the bass. 

Since the lures I mentioned above are used to replicate baitfish or bluegills the majority of the time, adding a swimbait as a trailer makes a lot of sense because it completes the lure package and makes it look very natural in the water.  Two of my favorites are the Zoom Swimmin’ Super Fluke Jr. for a smaller lure profile in the water, or the bigger Boot Tail Fluke to show the bass a big meal. 

Selecting colors for swimbaits as a jig trailer can go in two different directions.  The first being, match the hatch as they say, meaning if you are fishing in clear water and the bass want a natural presentation, then go with a swimbait that looks like what the bass are eating.  If they are eating shad, go with a shad colored swimbait, and if they are eating bluegills, go with bait that has more of a brown, green and blue color pattern to it. 

The other color selection possibility is when fishing in stained water, go with a swimbait that stands out and brings attention to your lure.  Such as when fishing a white swim jig or spinnerbait in the spring on a stained river, use a chartreuse colored swimbait, this will really make your bait pop and catch the bass’s attention. 

A subtle soft plastic swimbait that I rely on is a soft plastic jerkbait, like the Zoom Super Fluke.  This bait has the body of a baitfish and a uniquely shaped fork tail, that when left still, will move ever so slightly.  Fishing a soft plastic jerkbait like this is ideal when an active school of bass has shut down feeding.  Casting a white soft plastic jerkbait out to the school, letting it sink down, and then ever so slightly working it back to the boat with minor twitches of the rod tip will drive hungry bass wild. 

I will also employ a soft plastic jerkbait in areas where other topwater presentations would get hung up.  A weedless soft plastic jerkbait can be fished through heavy vegetation and dead sticked in the sweet spot to coax a tight-lipped bass into biting. 

It is important to use an extra wide gap hook when fishing a soft plastic jerkbait, as the bait has a lot of plastic that needs to slide up the hook when you set the hook.  If I’m fishing light line on a spinning setup, I’ll use the standard wire Lazer Trokar TK-110 Extra Wide Gap, but when I’m fishing around heavy cover and with baitcasting gear, I’ll go up to the TK-120 Magworm hook. 

If you are looking to add a new fishing presentation to your list of options this season, give swimbaits a shot. They can help you catch bass in tough situations, along with help increase your chances of catching that big bass you’ve been looking for. 

Glenn Walker has been fishing tournaments for over ten years, spreading his passion and knowledge of the sport via articles and videos.  He keeps busy fishing events across Minnesota and on the Mississippi River.  Glenn’s sponsors include:  Bass Boat Technologies, Humminbird, Mercury Marine, Minn Kota, Plano, Rayjus, Seaguar, Snag Proof, The Rod Glove, TroKar, War Eagle Custom Lures, Witch Doctor Tackle, Wright & McGill and Zoom Baits.  For more information check out glennwalkerfishing.com or on Facebook at facebook.com/glennwalkerfishing. 

The post Versatility of Soft Plastic Swimbaits appeared first on Morning Moss.

The Ice is Rotten…

$
0
0

THE ICE IS ROTTEN…

BUT THE FISHING’S NOT                                                                    

By: Kyle Sorensen 

Let’s face it, this winter has been a fierce one. Many days well below zero, various weather advisories, maybe a [few] back-breaking hours on the lake digging out your vehicle? It hasn’t been an easy one but I know one thing, we sure were given ice and a lot of it. Before you start the ever daunting task of first, finding all of your hard water equipment (Isn’t it amazing where some of it turns up?) and second, cleaning and storing it away for the season; WAIT!

As we pass into March, the bittersweet transformation to the late ice period begins. Bitter, because I know the ice fishing season will soon come to an end but sweet, because the best fishing I have yet to have all ice season is about to start. The ice might be getting rotten but the fishin’s sure not!

In this article, we are going to go into some reasons why I truly love this time of year and what factors go into my reasoning. Some of these factors can be said for various bodies of water but most will address my home waters of the Lake Winnebago System.

Weather

Late ice offers up a higher chance of those 35+ degree, calm, sunny days while there is still plenty of ice. It makes the trip more enjoyable and less of a hassle. It allows us not to have to hunker down in the portable shelter but rather sit on the side of a four wheeler, snowmobile or bucket, focusing on lure presentation and not about how our eyelashes have icicles.

It is no secret, when it’s warm out, we tend to be more active outside. We think more clearly and in turn we can operate more effectively and efficiently. This is good news for our mobility efforts from spot-to-spot, lure presentation and the overall eagerness to work for our prize catches. If we are comfortable, we can concentrate and in turn, catch more fish.

The weather plays an important role not only for us but also for the system as the warming weather begins the system “reboot”. The rivers open, melting water and rain purges oxygen into the main bodies of water and rays of sunlight begin to penetrate deeper into the water column. This in turn, gives the ecosystem the boost it needs to ready up for a busy summer.

Location

During other winter periods, we do not know where different species will be located, nor where they are heading, without some work. Sure, we can come up with an educated guess from the previous years’ experience but it’s not always a definitive answer. We all know it usually takes a lot of time to locate and pattern the fish movements throughout the winter months, however, we are given a heightened advantage during the late ice period.

Our location selection patterns should change during the transition from mid-winter ice to late ice. By now, we have an idea where our targeted species have been locating themselves throughout the past months. Taking this into account, we look to where they will be heading. If we are strictly chasing big gills, we might start looking to the shallower water depths as the ecosystem shock has sparked some life into the lifeless weeds. If we are on the hunt for ol’ marble eyes, we know they will be starting their classic spawning run so we might begin to look closer to the river areas.

On the Lake Winnebago System, various species begin to “stage” at, in and around the rivers for their annual spawning runs. When I say “stage,” I don’t mean they just sit around for a few days. It’s best to think of it as an area in which the schools bottle-neck and all the travel routes merge together. As these first schools begin to congregate in these areas, it is not uncommon to find fish under the first hole you drill. Does it always happen this easy? No, but if you can find safe ice around a staging area, and time it correctly, there will be large numbers of fish to be had.

A fair number of these fish will be active as they will be building up on the energy for their grueling journey. With the high numbers of fish in these confined areas, the forage base becomes very limited within a short period of time.   This means our presentations could show an amplified success rate with a more aggressive approach.

A key point to note is this. Fish will travel from all corners in each lake to get to their spawning grounds. If you can locate and stay on these movements, which will obviously end in the river areas (for some species), you will catch the fish and for a longer period of time.

Mobility

I can’t stress it enough. Whether it is early ice, mid-winter ice or late ice, mobility is, and always has been the key. The great part about fishing late ice is that we know where the fish will end up and by adjusting our movements (through trial and error) we will be able to track the targeted species all the way to their final winter location.

I stay very mobile and as I discussed in a previous area, the weather allows us to be more active outside. A warm day allows me to sit on the side of my snowmobile and offer a presentation that I would normally comfortably offer while within the warmth of a shack. Granted I must dress a little warmer but by limiting the amount of set-up and take-down time, I spend more time fishing and ultimately finding and catching fish more fish.

Whether it is the first or last spot for the day, my routine is as follows: Drilling one hole, taking just enough slush out of the hole to get my bait down, dropping the transducer down and jigging for 10-15 minutes (some might say this is too long). If I do not produce the results I am after, the transducer comes back up and I’m off after noting the details of my strike-out in the GPS. It’s that simple. Having my auger mounted on the back of my sled and traveling light allows me to spend less time messing around with other equipment I might need in other conditions.

Late ice, in a nutshell, is a blast. The most important thought I would like you to take out of this article is safety. With warming temperatures, melting ice and maybe some rain mixed in, ice conditions can deteriorate quickly. Once the safety issue has been taken into account, I will say this. Use the edge Mother Nature has given us. We know the fish will be moving and where they will be moving to. Through the use of mobility and trial and error, track and pattern these movements so you are able to take full advantage of everything late ice has to offer. Before you know it, it will have come and gone.

Until the hard water hits again next season, Tight Lines. Stay Dry.

The post The Ice is Rotten… appeared first on Morning Moss.

Springtime Brown Trout

$
0
0

SPRINGTIME IS BROWN TROUT TIME!

By Capt. Lee Haasch 

Got that itch for open water fishing? Late March and April is the time to scratch it with some brown trout action! Late March is that magical time of the year when you can launch your boat in the morning and troll the shallows of Lake Michigan for brown trout and then slide up to Green Bay and walk out on the ice and pop a couple of nice walleye in the evening. Every year it’s a waiting game for that magical day that the launching ramp is ice-free and we can back the Starcraft down the launch ramp and get after those “silver footballs!”

MOTHER NATURE

Depending on the year and Mother Nature, it could be mid to late March or sometime in early April when the sun melts the ice from the marina and it doesn’t take long for the word to get out that browns are biting! That’s because, well, after a long winter of being left alone, they ARE biting! They are cruising the shallow rocky shoreline of Lake Michigan feeding on gobies, stone rollers and other small baitfish that inhabit the structured shoreline.

Since the bay and other inland lakes are still ice covered at this time of year, it’s a no-brainer to grab my Ugly Stik GX2’s and Alphamar 16’s spooled with 50# Trilene Braid and 10# Trilene fluorocarbon leaders and hit the boat landing with a vengeance to tackle a few of those monster browns that are cruising the shoreline. Those first couple weeks can be some of the best as the browns have had all winter to forget about being chased. They are hungry and aggressive! A couple of Rapala #7 or #9 floaters or even a husky jerk are favorite weapons when cruising the shallow 8’ to 12’ in early season. Black/silver, black/gold, blue/silver and fire tiger are popular colors 

CLOSE ATTENTION

I like to pay close attention to my graph and the surface temperature as I’m trolling. I have found that often times, the areas where I get my bites are quite often patches of cloudy water where the water temperature can rise as little as 1 to 2 degrees. In those areas, the bait fish will tend to congregate and attract the hungry browns. When I find one of those patches, I will circle back and make several passes through that area and often pick up a fish or two with each pass through those cloudy patches. You will also find that the darker and more colorful baits, like firetiger and black/gold, will work the best in the cloudy areas as they tend to look the most like the gobies that the brown trout are feeding on.

As a bonus, you may also pick up a few lake trout in the shallows in early spring. They too are cruising the rocky shoreline feeding on those same gobies that the browns are chasing. For this reason, I also like to toss out a couple orange/gold Rapalas in my spread. Lake trout love orange and there is nothing like a good lake trout filet on the grill from that early spring cold water!

BROWNS AND LAKE TROUT

Since these browns and lake trout are in the rocky shallows feeding on gobies, I have found the downward swimming action of Berkley Flicker Shads and Flicker Minnows closely imitate the gobies and are quite deadly at times. I like the colors that closely resemble the gobies, like black/gold, black/gold sunset, slick sunset and firetiger. These also seem to work very well as the sun is coming up.

After you’ve made those first couple passes in the real shallow water in the early dawn hours, you will notice the bite slow as the sun gets higher in the sky. This is when I like to slide out and work that 15’ to 30’ of water. The browns and lakers don’t go away, but they do get a bit sketchy in that clear shallow water and will tend to slide a bit deeper once the sun gets a bit higher in the sky. This movement opens up more options in my spread. I will trade a couple of planer boards for my slide divers and bust out a couple super light R & R spoons. Slide divers work great for this because I can dial them to run out from the boat and also put a 50’ to 60’ leader behind the diver. This is a deadly combination for these hesitant browns and lake trout. 

Being a little deeper also allows you use your downriggers if you have them. Just like the slide divers, I set my riggers with longer 60’ or even 80’ leads and run them shallow, like 8’ to 10’ down. By getting the baits back a ways from the boat, the browns, especially in the cloudier water, will be comfortable striking baits that far back from the boat.

For current fishing reports or information on charter fishing check out my report page at www.FishAlgoma.com. From Captain Lee and the crew aboard the GRAND ILLUSION 2 – good luck and good fishing!

The post Springtime Brown Trout appeared first on Morning Moss.

Food Plots For All!

$
0
0

Prairie Planting for Wildlife

By: Steve Jordan

My wife and I were so impressed with the beautiful prairie fields and pot holes in North Dakota that we duplicated it on our Wisconsin property. In North Dakota, they have thousands of acres of public hunting. They call it “plot land” and it is posted as such. It always includes grassland, which includes prairie grasses and wildflower varieties. It usually encompasses many potholes surrounded by cattails, sedges, and other wetland plants.

These “plot lands” hold a variety of upland birds, along with many ducks and geese. Whitetail deer are common in the high grass and cattail areas. 

For our prairie project we worked with the Outagamie County Farm Service Agency, which is a part of the U.S. Department of Agriculture. We had a lot of help from many people in our local office. Julie Peterson was our main contact. She is in a partnership position with the FSA and the Pheasants Forever organization as a biologist. Julie could visualize our idea of replicating the North Dakota landscape. Her help was invaluable. Pheasants Forever is a great resource for most of the prairie seeds that you will need. They also have the knowledge and the equipment to help you maintain your prairie throughout the years. 

Planting and maintaining a prairie may seem simple, but it is just the opposite. You will need the patience of a bow hunter or the patience of a Detroit Lion football fan. If you can babysit your prairie for three years, the maintenance thereafter will be minimal.

A good prairie mix will have up to thirty varieties of grasses and prairie flowers. Each variety is a perennial. Most varieties of weeds are annuals. During the first three years, you will want to mow your prairie periodically at approximately eight inches high. By doing this, the annual weeds that depend on their seed cluster to reproduce are continually chopped off. Eventually the weed dies with no offspring. The prairie plants, on the other hand, are stunted on top, but continually work on their root systems. These massive root systems will eventually choke out most weeds that try to grow amongst them. One example is on one of my first prairie plantings near Readfield, Wisconsin over 25 years ago. I thought about how nice it would be to incorporate some big Russian sunflowers randomly through the established prairie area. I took a 4-foot re-rod, ½ inch in diameter and poked holes 2-3 inches deep. Then I would drop a sunflower seed in the hole and close it up. I planted approximately 100 seeds; they were all choked off and yellow at two inches high. This is what happens to annual weeds on a well established prairie planting.

Here is another example of how thick the root systems get. I had an opportunity to put on a hands-on food plot seminar during the Whitetail Classic event at the Bubolz Nature Center. They gave me ¼ of an acre of an established prairie to work up for the demonstration. The area was mowed and then I had to work up the sod. The root systems were amazing and my disk would not cut into the sod base. I ended up scooping out most of the root systems in this area with my tractor bucket. I ended up with a pile of roots as big as a full-sized van. I’ve never encountered a sod base as thick and dense as the Bubolz prairie project. 

In some areas of the prairie, trees and brush will try to get established. The mowing will keep them in check for the first three years. A recommended burn of the prairie or area on the fifth year will get rid of them. The Pheasants Forever organization can help you with the burning of your prairie safely. They have access to the equipment and trained staff. 

A common weed that tries to establish itself in prairies is the thistle. After the three year mowing period, you should keep an eye on any of the problem areas. The big bull thistles are easy to spot because they will tower over the prairie grasses. My wife and I will go looking for them with a weed shearers and a small squirt bottle of Round Up. We will cut the thistle to about one foot off the ground to discourage flowering. Then we will carefully spray a few of the lower, wide thistle leaves with Round Up, trying not to over spray anything around it. If you have an area that is heavily infested with thistles in your mature prairie, you can just mow that area to 8-10 inches high. You may have to mow that area a couple of times so the thistles don’t flower. In late fall you will notice the prairie grasses turn brown and go dormant. The thistle plants will still be a nice green and very healthy looking. At that time, you can liberally spray Round Up over the entire area. The thistles will die and the dormant grasses will not be affected. Geez…..I wish we could get rid of the pesky San Francisco 49ers that easily! 

At our current place of residence, we have 14 acres of prairie with a one acre shallow scrape or pond. The deer frequently bed in the tall grasses. The geese, ducks, turkeys, pheasants, and a huge variety of songbirds nest and feed in the prairie. We have two acres of a pollinator mix that consists of 100% wildflowers (no grasses) to attract nectar feeding birds and insects. We have had to mow that for the first three years. This coming spring will be the first year of not mowing. This year should be fantastic. It was very hard to mow last year when we noticed some of the wildflowers trying to bloom. 

The strategy behind a well planned prairie is to have some varieties flower early in the spring, some flowering mid-summer, and yet some waiting for the fall. Our prairie grass flower mix is only about 10% flowers and 90% grasses. It’s amazing how many flowers bloom in that mix. Prairie plantings are great for enhancing and diversifying your property. You can set up prairies next to food plots, ponds, woods, and agricultural fields. 

Remember, prairie plantings are a lot of work for the first three years, but after that, a minimal amount of maintenance is required. Have a great spring and think prairie for 2014.

The post Food Plots For All! appeared first on Morning Moss.

River Fishing For Walleye

$
0
0

River Fishing

By: Kyle Sorensen

It seems as though the hard water season has come and gone in my world.  The temps have risen, and the ice will soon be gone like the closing of a book.  This time is certainly bittersweet for me, as I love my ice fishing, I really do.  The only thing that helps to dull the pain is the excitement that ice-out brings… the springtime run on the Lake Winnebago System! 

When the ice drops and we are able to safely navigate the waters of the Upper Wolf, its game on!  These fish ride the contours and bends of the Wolf River and we must be able to hold in the patterns they travel.  The trick is finding these patterns, which can constantly change.  It was really interesting to witness the movements of the fish during last year’s run.  For whatever reason, the fish were active in certain bends and depths, while for other spots, the fishing action seemed nonexistent.  You might ask yourself as I do, “If these fish are active ten feet away from me (or wherever), why aren’t they active under me?”  Well, it’s a good question and there could be many answers.  As always, I would love to be able to tell someone, go to this spot, do this, and you will catch fish.  We know that’s certainly not always possible due to numerous factors, but I want to shed some light on the “Art of Draggin’”. 

Dragging jigs on our rivers during the run is a deadly tactic.  We have talked vertical jigging, pulling flies, the thumper floater; the list goes on.  While those tactics all have very important spots in my boat during the run, one must find out what is working for that day (or hour).  The short answer – be ready for it all! On a side note, I highly recommend going back into Badger Sportsman’s online archive to read about the other tactics we have previously talked about, as they are very important, just as much as draggin’ jigs. 

Let’s start with the basics – the equipment.  For dragging, I like rods that are 7’ long, which have a stiffer medium action.  While it’s easy to say a “medium” rod, if you feel three different rods that are listed under the medium category, chances are you will feel a difference in each.  I like a rod with a sensitive tip, but a stiffer blank that can handle some of the larger fish that present themselves.  A key to the 7’ length is the fact that the spring of the rod allows me to easily flip eating sized fish into the boat.  I run a rod in each of my hands, so the extra length also helps me get a little extra reach when I’m setting the hook and laying the other rod down at the same time.  As with everything, personal preference is what prevails, as the next person might recommend a 6’ rod with a different action.  If you’re new to this, you quickly find out what works best for you. 

The reels and their line go hand in hand.  For arguments sake, the reel you are using must have a very sensitive drag system.  Being able to fine tune your drag system is a huge advantage, especially on some of the more violent strikes that can happen from time to time.  In my case, it also protects from fish-loss due to my sometimes overly aggressive hooksets… haha! 

I am a strong believer in fluorocarbon because fluorocarbon is practically invisible in the water and it has great abrasion-resistant characteristics. With that said, all of my rods are either strung with full fluorocarbon or they at least have a 3’ fluorocarbon leader.  I really like braid for jigging, as it is so sensitive, allowing me to feel the sometimes very light mouthing bites.  The downside is that braid has very little stretch and going back to the drag system on your reel, you must have it set perfectly so you aren’t pulling it out of the fish’s mouth on hooksets.  If you like braid, I recommend an 8 lb. variety, complimented with a 6 lb. fluorocarbon leader.  I connect the two with a very small barrel swivel, as it makes reties a whole lot easier – chances are you will certainly be donating a lot of jigs to river structure!  If you run straight fluorocarbon, a 6 lb. class is great.  A huge thing to remember, seeing we are going to be fishing the bottom of the river, is the fact that our line will be running into sharp edges, especially when crossing paths with the infamous zebra mussel.  It is critical that you are constantly checking your line for even the smallest of nicks.  If one is found, retie immediately.  

Jigs come in a variety of sizes.  While color can sometimes make a difference, in my opinion, it’s at the bottom of the totem pole in terms of importance.  I feel the most important aspect is the weight.  I wish I could say all you need is a 1/16 oz. jig and you’re set, but that is certainly not the case.  The current in the river is constantly changing and because of that, so should the weight of our jigs.  We have to keep a nice angle from the boat to the bottom so we are able to feel the jig just grazing across it.  The trick is also not having too heavy of a jig causing it to sink into the bottom or cause your line to become vertical.  We want those jigs to just dance/shimmer across the bottom.  So, make sure to have a variety of sizes to accomplish this, usually ranging from 1/16 to 1/4oz.  I like normal lead-heads, but some adamantly prefer hair jigs, which are basically lead-heads with some hair tied on the shank.  Depending on the bite, it’s not a bad idea to have stinger hooks on hand.  Sometimes the fish will barely mouth the bait and are gone before you know it.  The stinger can drastically add to your hook-up percentages! 

Bait is a huge topic, but I will sum it up.  It is important to have minnows, leeches and crawlers in the boat with you.  One day last year, all I could catch on crawlers were goats and small eyes.  I switched to leeches and Bam!  Quality fish started showing up.  The easiest way to find out what they want on a particular day is to have your partners trying the opposites of you.  The fish will show you what they want, and you can then make the switch. 

So now we’re rigged and its time to hit the water.  Boat control and positioning are extremely important aspects to pay attention to if you want to be successful while draggin’ jigs.  The basic concept is simple, motor upriver and drift back, allowing your jigs to drag across bottom.  A basic run for me is to either pick the left or right side of the river, usually off of a break to start, but that can change very quickly.  I will run up past the area I want to target and drop the Minn Kota, utilizing it to keep the boat perpendicular to the drift of the specific area I am shooting for.  If I am fishing by myself, I will run a parallel drift, using the Kota to not only control my drift, but also to slow it down which allows me more time in holes or structures I come across.  If the first pass area doesn’t pan out, I will make another next to the first one, and so on, as to eliminate the water in that certain bend of the river.  If nothing is panning out, it’s time to make a run to a new section of the river. 

An important area to speak on is the presentation of the jig.  While yes, we are mainly just dragging the jig across bottom, I do like to lift the rods up from time to time to not only check for debris, but to throw in a little more action.  If a fish is following it and can’t snatch it off bottom, sometimes this helps to give it a better angle to get it in its beak. 

As a good rule (even though its certainly not 100%) walleye can certainly turn off when the current is slow and/or practically nonexistent.  If you are chasing the river runners and the bite isn’t there, chances are, neither is the current.  Don’t give up as the current can change at any given time.  Have a bunch of jigs with you, pay close attention to your electronics, and have a ball.  If you want to see some draggin’ action from last year’s run, check out the video on the OB Outdoors YouTube Channel (youtube.com/oboutdoor).  

I hope you all have an awesome start to the open water season, no matter where you find yourself!  If you are hunting down walleye during the run this year, I’m sure you are going to have some fun times just as years past.  Until next time, “Tight Lines. Stay Dry. 

The post River Fishing For Walleye appeared first on Morning Moss.

Viewing all 196 articles
Browse latest View live


Latest Images